Howto Juniper SSG
Contents
- 1 Introduction
- 2 Overview
- 3 Gateway Configuration
- 4 Client Configuration
- 5 Known Issues
- 6 Resources
Introduction
This guide provides information that can be used to configure a Juniper SSG or Netscreen device running firmware version 5.4+ to support IPsec VPN client connectivity. The Shrew Soft VPN Client has been tested with Juniper products to ensure interoperability.
Overview
The configuration example described below will allow an IPsec VPN client to communicate with a single remote private network. The client uses the push configuration method to acquire the following parameters automatically from the gateway.
- IP Address
- IP Netmask
- DNS Servers
- WINS Servers
Gateway Configuration
This example assumes you have knowledge of the Juniper gateway Web configuration interface. For more information, please consult your Juniper product documentation.
Create a Phase1 ID
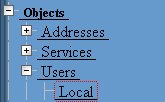
Create a user that is used to define the phase1 id parameters. Navigate to the following screen using the tree pane on the left hand side of the browser interface.
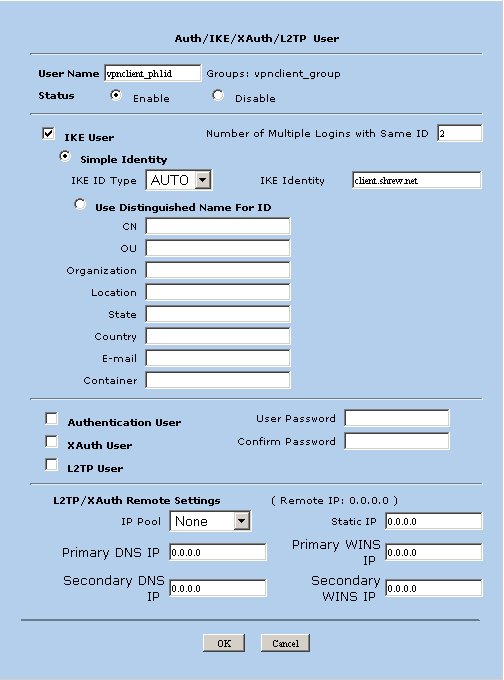
Click the New button and define the following parameters.
- User Name = vpnclient_ph1id
- Status = Enabled
- IKE User = Checked
- Simple Identity = Selected
- IKE ID Type = AUTO
- IKE Identity = client.domain.com
Create a Local Key Group
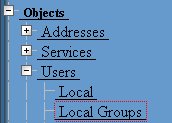
Create a Local Group that can be assigned to an Auto Key Advanced Gateway. Navigate to the following screen using the tree pane on the left hand side of the browser interface.
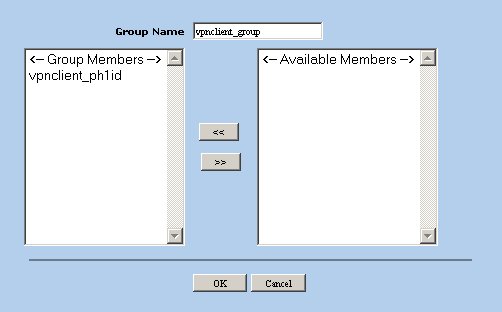
Click the New button and define the group name as vpnclient_group. Also add the vpnclient_ph1id user object as a group member.
Create an Auto Key Advanced Gateway
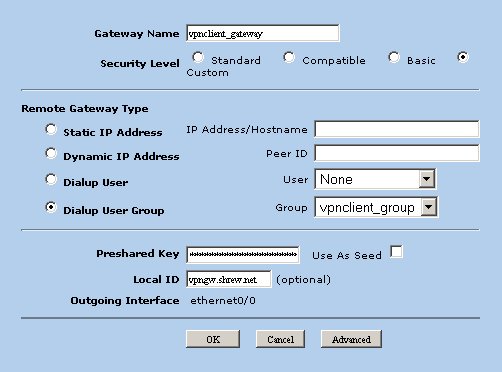
Create an auto key advanced gateway to configure the phase1 parameters. Navigate to the following screen using the tree pane on the left hand side of the browser interface.
Click the New button and define the following parameters.
- Gateway Name = vpnclient_gateway
- Security Level = Custom
- Remote Gateway Type = Dialup User Group
- Group = vpnclient_group
- Preshared Key = mypresharedkey
- Local ID = vpngw.domain.com
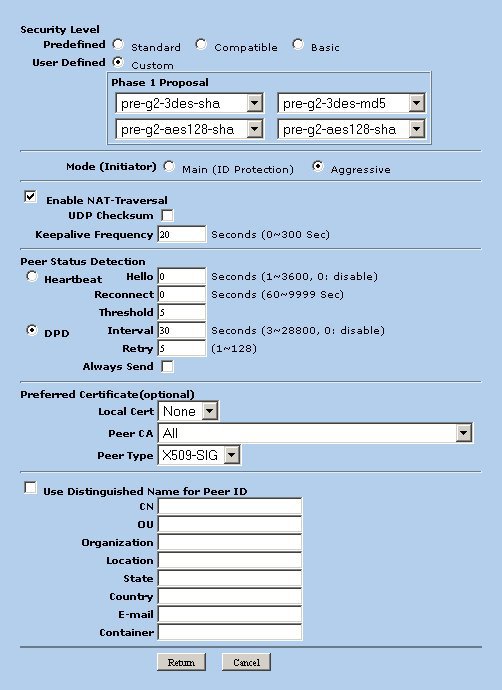
Define Advanced Parameters
Click the Advanced button and define the following parameters.
- Security Level - Custom
- Phase 1 Proposal
- pre-g2-3des-sha
- pre-g2-3des-md5
- pre-g2-aes128-sha
- pre-g2-aes128-md5
- Mode = Aggressive
- Enable NAT-Traversal = Checked
- Keepalive Frequency = 20
- Peer Status Detection
- DPD = Selected
- Interval = 30
- Retry = 5
When finished click Return.
Define Xauth Parameters
You will now see your auto key advanced gateway listed. Click non the Xauth button in the Configure column.
Image(http://www.shrew.net/static/howto/JuniperSsg/nav-4.jpg)
Define the following parameters.
- Xauth Server = Selected
- Allowed Authentication Type = Generic
- Local Authentication = Selected
- Allow Any = Selected
When finished click OK.
Image(http://www.shrew.net/static/howto/JuniperSsg/ssg-4.jpg)
Create an Auto Key IKE Gateway
Create an auto key IKE gateway to configure the phase2 parameters. Navigate to the following screen using the tree pane on the left hand side of the browser interface.
Image(http://www.shrew.net/static/howto/JuniperSsg/nav-5.jpg)
Clicking the New button and define the following parameters.
- VPN Name = vpnclient_tunnel
- Security Level = Custom
- Remote Gateway Predefined = vpnclient_gateway
Image(http://www.shrew.net/static/howto/JuniperSsg/ssg-5a.jpg)
Define Advanced Parameters
Click the Advanced button and define the following parameters.
- Security Level = Custom
- nopfs-esp-3des-sha
- nopfs-esp-3des-md5
- nopfs-esp-aes128-sha
- nopfs-esp-aes128-md5
- Replay Protection = Checked
When finished click Return.
Image(http://www.shrew.net/static/howto/JuniperSsg/ssg-5b.jpg)
Create a Client Address Pool
Create a pool of addresses to be assigned to VPN clients. Navigate to the following screen using the tree pane on the left hand side of the browser interface.
Image(http://www.shrew.net/static/howto/JuniperSsg/nav-6.jpg)
Clicking the New button and define an IP Pool. For example, you could define a pool named vpnclient with a start IP address of 10.2.21.1 and and end address of 10.2.21.254.
Image(http://www.shrew.net/static/howto/JuniperSsg/ssg-6.jpg)
Set Client Configuration Parameters
The client configuration parameters are stored in the global Auto Key Advanced XAuth parameters. Navigate to the following screen using the tree pane on the left hand side of the browser interface.
Image(http://www.shrew.net/static/howto/JuniperSsg/nav-7.jpg)
Define the following parameters.
- Reserve Private IP for XAuth User - 480 minutes
- Default Authentication Server = Local
- Query Client Settings on Default Server - Unchecked
- CHAP - Unchecked
- IP Pool Name = vpnclient
- DNS Primary Server IP = [ private DNS server address ]
- DNS Secondary Server IP = [ private DNS secondary address ]
- WINS Primary Server IP = [ private WINS server address ]
- WINS Secondary Server IP = [ private WINS secondary address ]
Image(http://www.shrew.net/static/howto/JuniperSsg/ssg-7.jpg)
Configure IPsec Policies
The last step for the tunnel configuration is to define policies that allow protected traffic to pass into your private network from the client. Navigate to the following screen using the tree pane on the left hand side of the browser interface.
Image(http://www.shrew.net/static/howto/JuniperSsg/nav-8.jpg)
To create a new IPsec Policy, the from and to zones must be specified. An IPsec VPN Client policy is defined. Select the following zones and click the New button.
- From = Untrust
- To = Trust
Image(http://www.shrew.net/static/howto/JuniperSsg/ssg-8a.jpg)
Define the following parameters.
- Name = vpnclient_inbound
- Source Address
- Address Book Entry = Dial-UP VPN
- Destination Address
- New Address = 10.1.2.0/24
- Service = ANY
- Application = None ( means ANY )
- Action = Tunnel
- Tunnel = vpnclient_tunnel [ Auto Key IKE vpn name ]
Image(http://www.shrew.net/static/howto/JuniperSsg/ssg-8b.jpg)
Create Local User Accounts
Create local user accounts that will be used during Xauth. Navigate to the following screen using the tree pane on the left hand side of the browser interface.
Image(http://www.shrew.net/static/howto/JuniperSsg/nav-1.jpg)
Click the new button and define the following parameters.
- User Name - joe ( the xauth user name )
- Status - Enable
- XAuth User - Checked
- User Password - **** ( the xauth user password )
- Confirm Password - **** ( the same user password )
When finished press OK.
Image(http://www.shrew.net/static/howto/JuniperSsg/ssg-9.jpg)
Client Configuration
The client configuration in this example is straight forward. Open the Access Manager application and create a new site configuration. Configure the settings listed below in the following tabs.
General Tab
The Remote Host section must be configured. This Host Name or IP Address is defined to match the Junipers public interface address. The Auto Configuration mode should be set to ike config push.
Phase 1 Tab
The Proposal section must be configured. The Exchange Type is set to aggressive and the DH Exchange is set to group 2 to match the Auto Key IKE Advanced definition.
Authentication Tab
The client authentication settings must be configured. The Authentication Method is defined as Mutual PSK + XAuth.
Local Identity Tab
The Local Identity parameters are defined as Fully Qualified Domain Name with a FQDN String of "client.domain.com" to match the Phase1 User ID value.
Remote Identity Tab
The Remote Identity parameters are defined as Fully Qualified Domain Name with a FQDN String of "vpngw.domain.com" to match the Auto Key Advanced Gateway ID value.
Credentials Tab
The Credentials Pre Shared Key is defined as "mypresharedkey" to match the Auto Key Advanced Gateway Preshared Key value.
Policy Tab
The IPsec Policy information must be manually configured when communicating with Juniper gateways. Create an include Topology entry for each IPsec Policy network created on the gateway. For our example, a single Topology Entry is defined to include the 10.1.2.0/24 network.
Known Issues
None reported.
